


Running and Integrating Archivematica and AtoM with Vagrant
I really like the Vagrant option that Artefactual makes available for testing Archivematica and AtoM. It’s quick and easy to get an instance of each up and running that is great for testing in a super low-risk situation. Though we also have development instances of Archivematica for this purpose at my workplace, one understandable but roadblock-y thing is that librarians/archivists like myself don’t get admin access (probably for good reason), so when I need to verify something that requires root permissions it’s really useful to have the local option. I’ve tried using Docker for Mac with Archivematica but it’s never really worked well for me, probably because it’s in development, I don’t really know Docker, and/or memory/space limitations.
One thing I’ve been trying to do for a while is get the Archivematica and AtoM Vagrant boxes to integrate around the DIP deposit feature so I can better understand the workflow between the two. The setup instructions that follow are specific to this: they will take you through the process of getting both VMs running at once, and then on how to integrate the two for the Archivematica to AtoM workflow. If you are thinking of setting up and connecting both applications at your workplace, doing so here should give you a good sense of how to connect the two in production, though of course with the difference of your own appropriate production deployment settings since Vagrant isn’t suitable for production use.
These instructions are current as of the time of writing. It assumes you are already familiar with Archivematica/AtoM generally and are comfortable using the command line (if you’re not familiar with these things, check out Ashley Blewer’s fantastic intro to the command line deck and the overviews of Archivematica and AtoM). If you’re also new to Vagrant a good way to start is to install either AtoM or Archivematica by themselves using the Vagrant instructions provided here and here. Make sure you have Vagrant and VirtualBox already installed as per the instructions in Archivematica’s documentation. Overall, I am very grateful to Artefactual for making these environments available and clearly documenting Vagrant setup and upgrades in the official documentation for each project.
Get to know your vagrant commands as well:
vagrant up(gets a box up and running)vagrant suspend(saves the current state if you have something in process, but takes more disk space)vagrant halt(shuts down the machine; similar to shutting down your computer)vagrant status(lets you know the status of your VMs in case you can’t remember if something is running or not).vagrant destroy(deletes the current machine, but not the base box - see below)
Another note of interest is that when you first install a Vagrant box from source, it imports a base box that is then used as the local source for the VM. This is the version you are using when running vagrant up. But if you want to update that box, you have to replace it with a new version by running vagrant box update. This doesn’t actually delete the older version from your machine either; you can list all boxes by running vagrant box list and remove any boxes by running vagrant box remove and identifying a version where appropriate. If you have installed a previous version for testing at some prior time, you may need to update your base box first.
I’m putting these instructions up because I’ve so, so often found it helpful when others have documented their how-tos, especially when they have spelled out basic things to learn-as-you-go types like me. I can’t guarantee they will work in your specific scenario and setup and I don’t really a ton of knowhow to troubleshoot if something goes wrong, though the Archivematica/AtoM forums are both great for this kind of advice. If you have suggestions for better/faster/smarter ways to do any of the below, let me know! I’m sure there’d be a nice way to automate all of this with Jenkins or something but that is way beyond me. Also, I’m running OSX 10.14 with 8GB RAM and 4 CPUs on a 6-year-old MacBook Pro without much disk space left, so, you know, that comes into it too. You are more likely to run into issues relating to disk space and memory here than anything else. Finally, please drop me a line if you find any errors in this post.
A. Set up Archivematica and AtoM Vagrant boxes
There’s a great way to set up and run multiple Vagrant VMs at once using a method nicely explained here by Scott Keck-Warren. I modified the example Vagrantfile in Keck-Warren’s post for Archivematica and AtoM. This is copied below. The Archivematica VM is named “am” for short and the AtoM VM is named “atom”. The nice thing about this setup is that you can choose to run up both VMs at once, or just one, using their names, e.g. vagrant up for both, or vagrant up am for just Archivematica.
1. Make a directory (I keep mine in my root user directory but I think you can put it anywhere). I’m calling it archives-vagrant and cd into it:
mkdir archives-vagrant && cd archives-vagrant
2. Create a text file called Vagrantfile with no extension using your favourite text editor and copy the below into it:
Vagrant.configure("2") do |config|
  config.vm.define "am" do |am|
    am.vm.box = "artefactual/archivematica"
    am.vm.hostname = 'am'
    am.vm.box_url = "artefactual/archivematica"

    am.vm.network :private_network, ip: "192.168.56.101"
    am.vm.network :forwarded_port, guest: 22, host: 10122, id: "ssh"

    am.vm.provider :virtualbox do |v|
      v.customize ["modifyvm", :id, "--natdnshostresolver1", "on"]
      v.customize ["modifyvm", :id, "--memory", 4096]
      v.customize ["modifyvm", :id, "--cpus", 2]
      v.customize ["modifyvm", :id, "--name", "am"]
    end
  end

  config.vm.define "atom" do |atom|
    atom.vm.box = "artefactual/atom"
    atom.vm.hostname = 'atom'
    atom.vm.box_url = "artefactual/atom"

    atom.vm.network :private_network, ip: "192.168.56.102"
    atom.vm.network :forwarded_port, guest: 22, host: 10222, id: "ssh"

    atom.vm.provider :virtualbox do |v|
      v.customize ["modifyvm", :id, "--natdnshostresolver1", "on"]
      v.customize ["modifyvm", :id, "--memory", 2048]
      v.customize ["modifyvm", :id, "--cpus", 2]
      v.customize ["modifyvm", :id, "--name", "atom"]
    end
  end

end
What is going on in this file? This set of instructions tells Vagrant to import and create Vagrant boxes from the Archivematica and AtoM sources (or base box if you already have these downloaded by installing one or both boxes before). It has also created a private network and forwarded ports that do not conflict so you can run them both at once, and ssh from one into another easily. The IP addresses come in again later when we set up Archivematica to talk to AtoM.
Secondly, I’ve set specific RAM and CPU settings so that the boxes don’t melt my computer when they run. Archivematica has been given 4GB RAM and 2 CPUs. The default for the Archivematica Vagrant box if you don’t configure these is double this, I think. If you have more RAM/CPUs available on your computer you might not need this change. Archivematica works fine with these settings provided you are processing small packages. AtoM has been given 2GB RAM and 2 CPUs which is the default if you load the default AtoM box. These allow me to run the machines and also use my computer for other tasks without it all coming crashing down, but you might have to modify these settings for the limitations or capacity of your own system.
3. Okay, now still within the archives-vagrant directory, run vagrant up and Vagrant will load your boxes together. This may take some time depending on your connection.

4. Once they are running, you can go to your browser and open:
- 10.10.10.20 for Archivematica. Log in with the username
adminand passwordarchivematica - 10.10.10.10 for AtoM. Log in with the e-mail
demo@example.comand passworddemo
If you get a “502 Bad Gateway” error in the browser for Archivematica it often resolves by just waiting a minute and then reloading the address.
B. Implement ElasticSearch fix and update Archivematica
If, like me, you are working with restricted disk space, you might need to implement the following fix to enable proper AIP indexing. This was helpfully documented on the Archivematica forum.
1. Log into your Archivematica box
vagrant ssh am
2. Run the following commands:
sudo apt-get clean
sudo apt-get update
3. Install curl with
sudo apt-get install curl (it isn’t there by default)
4. Run:
curl -XPUT -H "Content-Type: application/json" http://localhost:9200/_all/_settings -d '{"index.blocks.read_only_allow_delete": null}'
The upgrade step below is optional, but currently, the version of Archivematica that ships with Vagrant is v. 1.10.0. To take advantage of bug fixes in 1.10.1 (and any future releases - it looks like 1.11 is going to be released soon!), you can choose to update Archivematica with these instructions.
Instructions on updating a Vagrant machine are in the Archivematica documentation here and you should check them against the below when upgrading to future versions. I’m copying them here for simplicity but please head there to get the downlow on what all these steps are doing. Note that the upgrade will probably consume some resources and take a bit of time, so it’s a good time to exit any memory-intensive applications you have open.
1. First up, I found the upgrade fails unless you run as root:
sudo -i
2. Then run
apt-get clean
apt-get update
just in case - it’s definitely needed if you did not run them already above.
3. Archivematica’s instructions get you to run sudo pip install ansible but you will likely get a warning that Ansible is already installed.
4. Then run the following commands line by line:
git clone https://github.com/artefactual/deploy-pub.git
cd deploy-pub/playbooks/archivematica-bionic
ansible-galaxy install -f -p roles/ -r requirements.yml
echo 'am-local   ansible_connection=local' > hosts
ansible-playbook -i hosts singlenode.yml --tags=elasticsearch,archivematica-src

The last command will run the install script, which will run through its tasks and you will hopefully get a happy little recap at the end telling you all went well. You can now open to your Archivematica instance in the browser and head to Administration > Version to see 1.10.1 reflected in the version line, and you should be able to process and store a transfer successfully.
C. Check into AtoM
The version that installs with Vagrant is actually a bit ahead of the current public release - you get v. 2.6.0.2 with Vagrant whereas 2.5.3 is the current stable version. This is so that AtoM’s Vagrant environment can be easily used for QA testing, I think. In my brief test I didn’t see any major issues with using the qa/2.6 version here too, but instructions are at included the end of this post for using 2.5.3 in case you want to verify your tests against the current stable version.
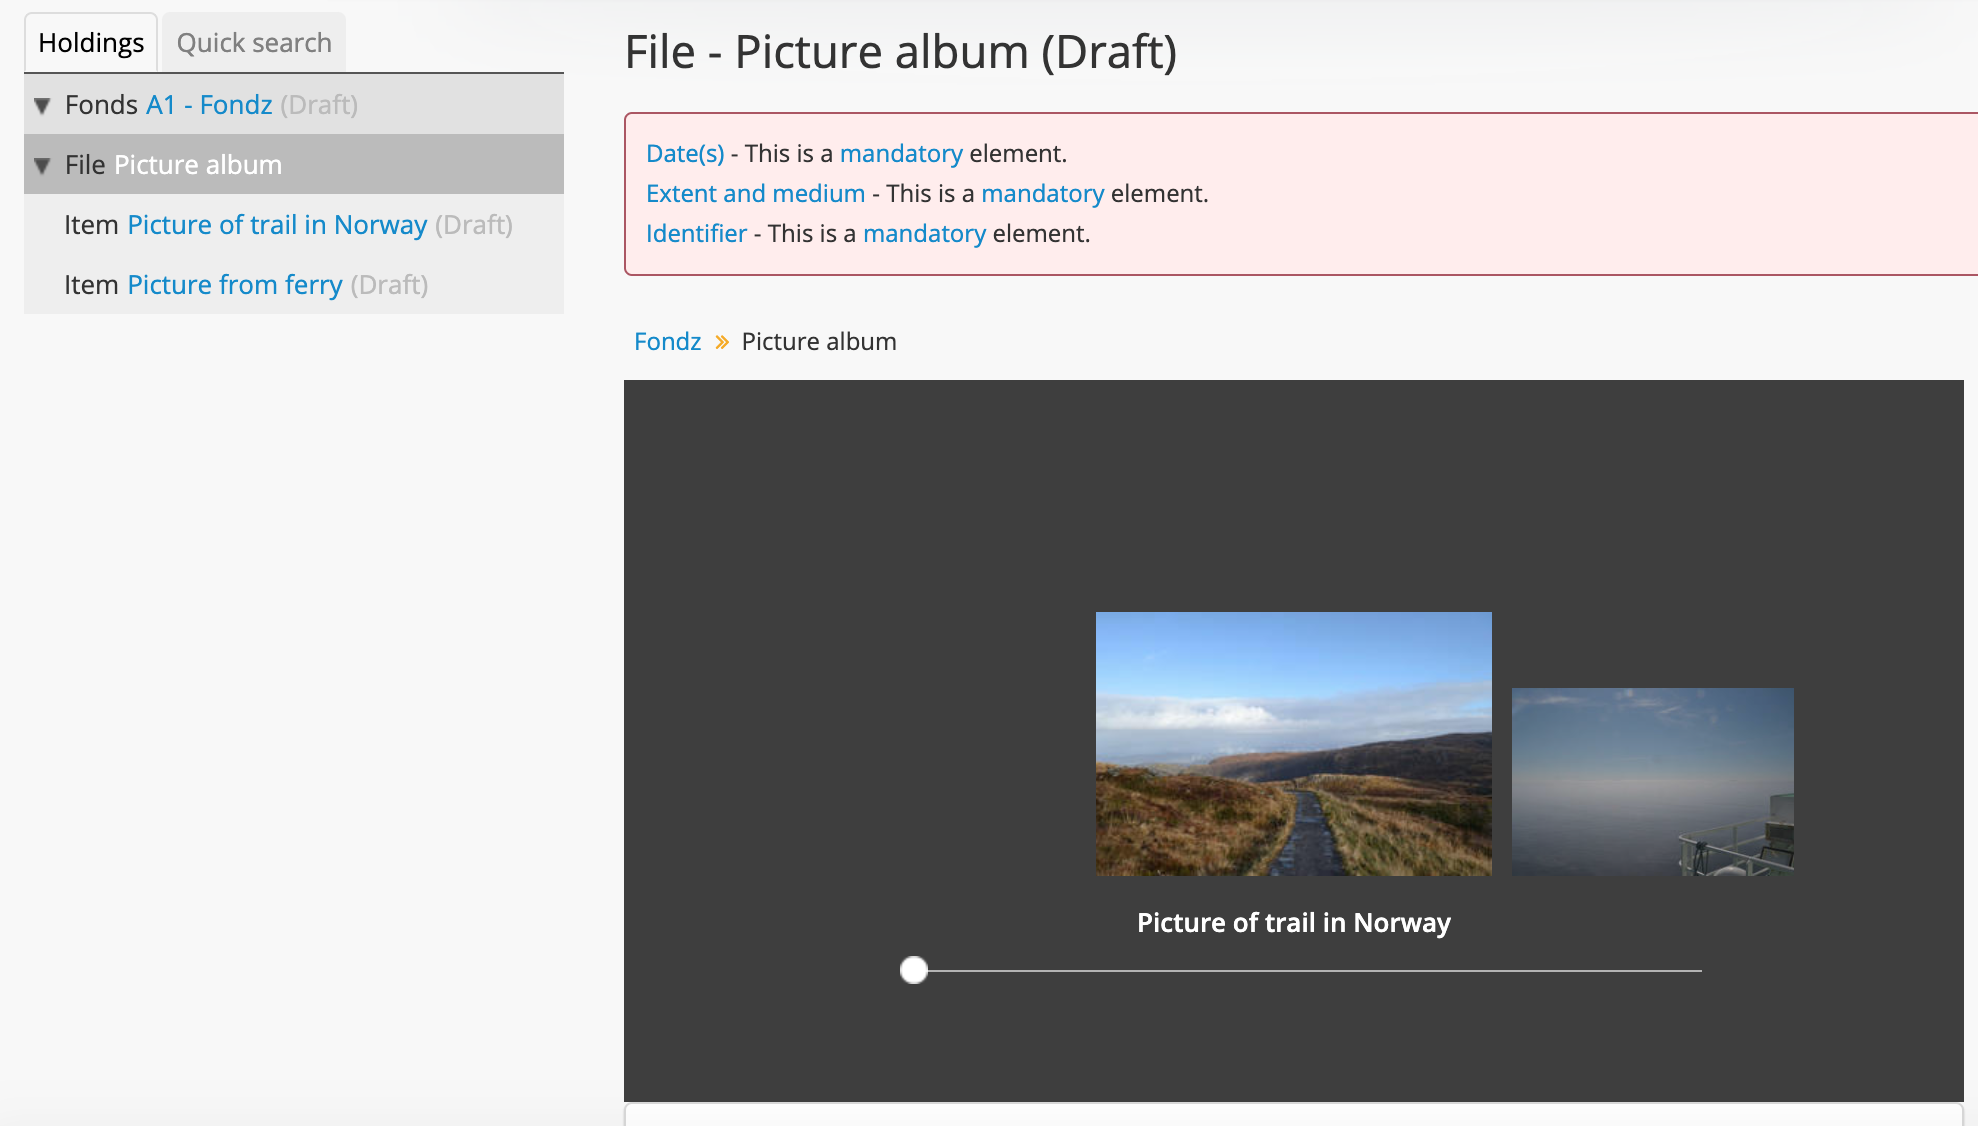
While you are at AtoM, you should also go and make a quick draft archival description - identifier, title, and selection of level of description (I usually pick fonds) is enough. You don’t have to publish it.
D. Integrate Archivematica and AtoM
Alright, final step. The instructions for integrating Archivematica and AtoM are laid out here and also here. I’m copying them here for clarity but these are just slightly tweaked from Artefactual’s documentation. You’ll need both Vagrant boxes up and ready to roll.
1. First, log in to the Archivematica vagrant box
vagrant ssh am
2. You will need a text editor for the next task, so install vim (the classic, still widely used command line text editor), which isn’t installed by default in the Vagrant box. I’m writing out the vim commands here, but you can also learn them here.
sudo apt-get install vim
3. After agreeing and installing the package, then run:
sudo -u archivematica ssh-keygen
4. When prompted with “Enter file in which to save the key (/var/lib/archivematica/.ssh/id_rsa):” hit enter. When prompted to enter a passphrase, keep it blank.
5. Run the following, which will open up vim:
sudo vim /var/lib/archivematica/.ssh/id_rsa.pub
Copy the entire contents of this file from the first character up to, but not including, the ~ lines into a plain text file on your desktop or wherever.
To quit vim write :q and then exit your archivematica machine (exit) and then login to your AtoM box with vagrant ssh atom.
6. Now, inside AtoM, run the following, line by line:
sudo apt-get install rssh
sudo useradd -d /home/archivematica -m -s /usr/bin/rssh archivematica
sudo passwd -l archivematica
7. The following will open up vim again:
sudo vim /etc/rssh.conf
Hit the letter i to edit this file, and uncomment (i.e. remove the # sign) from the line allowrsync. Hit the escape key and then write :wq to save the file and exit.
8. Then run these two commands:
sudo mkdir /home/archivematica/.ssh
sudo chmod 700 /home/archivematica/.ssh/
9. And run the following. This will open up vim yet again:
sudo vim /home/archivematica/.ssh/authorized_keys
Now it is time to paste in the contents of the ssh key you generated in Archivematica. Hit the ‘i’ key, paste it in, hit escape and then :wq again. Make sure you’ve got it all in there - the first time, I pasted it in without hitting ‘i’ first and couldn’t for the life of me figure out why ssh wasn’t working!
10. Finally, run:
sudo chown -R archivematica:archivematica /home/archivematica
and exit AtoM.
11. Okay, a little bit more back-and-forth. Vagrant ssh yourself back inside the Archivematica instance (vagrant ssh am) and become a root user via sudo -i.
Then run su archivematica and then ssh 192.168.56.102
You’ll get a warning starting with “The authenticity of host ‘192.168.56.102 (192.168.56.102)’ can’t be established.” Since you can trust this connection with yourself, enter ‘yes’.
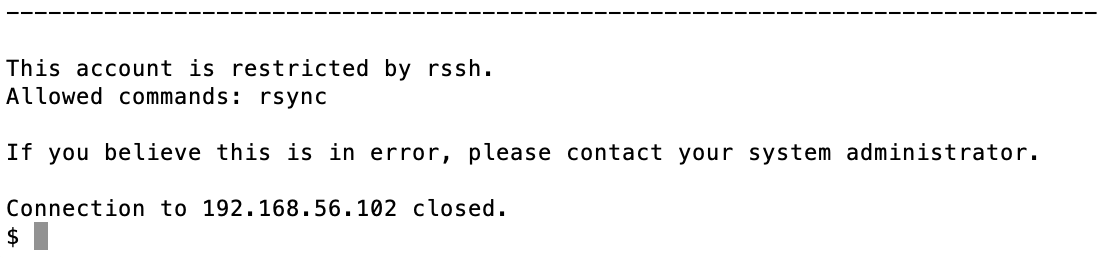
If things are working, you will then be logged into AtoM! You should see a sweet ASCII logo of AtoM as if you were logged in through the normal method, and below it, “This account is restricted by rssh. Allowed commands: rsync If you believe this is in error, please contact your system administrator. Connection to 192.168.56.102 closed.” Thanks to Kevin Bowrin for identifying the importance of this step. It adds the AtoM instance to the Archivematica VM’s list of known hosts so future connections can be run without intervention.
12. Exit out of the archivematica user, root and then again out of your Archivematica instance. Use the ssh command one last time (for now) to get into your AtoM instance and run a couple restarts:
sudo service gearman-job-server restart
sudo systemctl restart atom-worker
13. Logged into your AtoM VM through the browser, you can also head to Admin > Plugins and enable the arRestApiPlugin to be able to fetch levels of description for use in the appraisal workflow and/or the metadata-only upload (there are a few other setup steps regarding this workflow documented here)
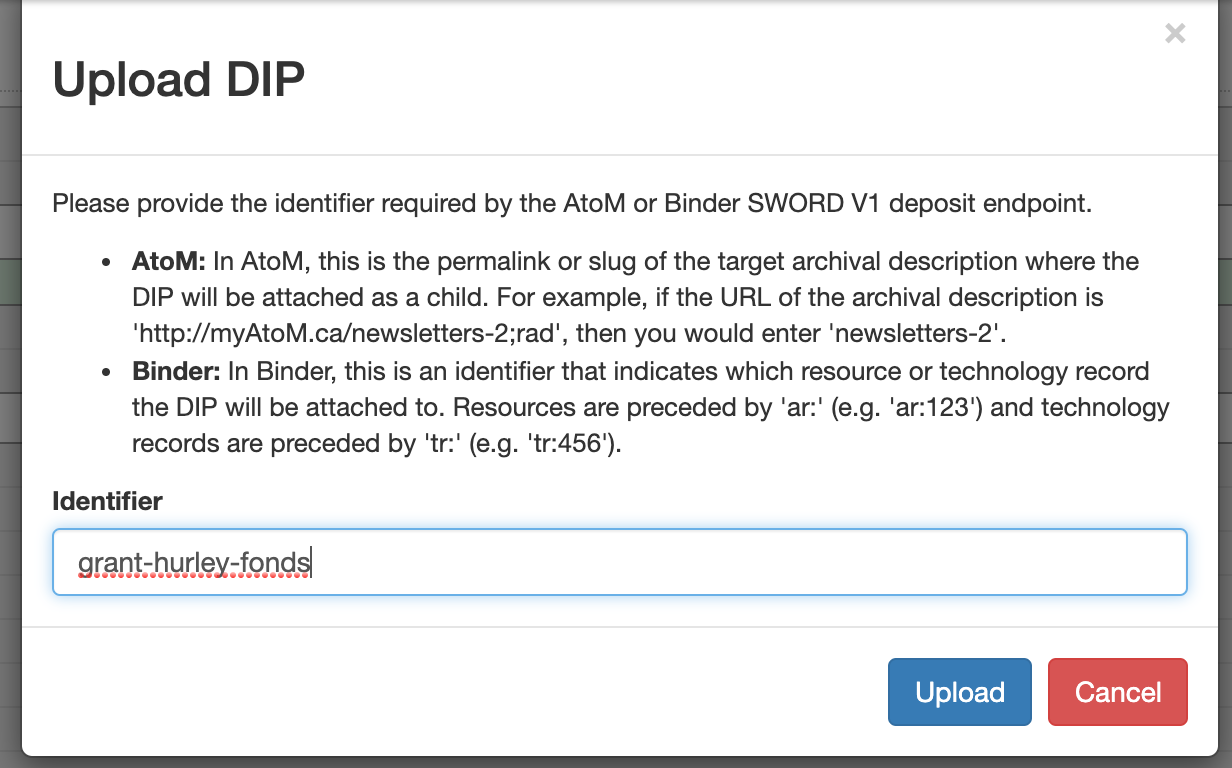
14. Okay, last thing. In Archivematica, go to Administration > AtoM/Binder DIP Upload and enter the following settings:
- Upload URL: http://10.10.10.10
- Login email: demo@example.com
- Login password: demo
- Rsync target: archivematica@192.168.56.102:/tmp/
15. Now it’s the moment of truth: run through a transfer, select normalization for access, send that DIP to a description in AtoM, and see your beautiful DIP uploaded!
E. Optional: Downgrade to stable AtoM version
This is not a step, but an additional approach to installing your AtoM VM. The version that installs with Vagrant is 2.6.0, which is a QA version that is ahead of the current stable release. You can keep this as-is, or you could choose to run the most current stable version (right now, 2.5.3) if you are interested in verifying your tests against that release.
The way to do this is to specify the version in your Vagrant file back up in step A by adding the following line:
atom.vm.box_version = "2.5.0"
This will import the older version. The version it will import is actually a QA version of 2.5 so you will need to run a few upgrade steps within the AtoM box using the following instructions (adapted from the AtoM documentation here) to bring you up to the stable release.
vagrant ssh atom
cd atom
git fetch origin stable/2.5.x
git checkout stable/2.5.x
php symfony cc
sudo systemctl restart php7.0-fpm
sudo systemctl restart atom-worker
php symfony tools:upgrade-sql ## you will get a request to proceed
php symfony search:populate
make -C plugins/arDominionPlugin
You should now be able to log into your AtoM instance, navigate to Admin > Settings and view the current version - 2.5.3. You’d then proceed with step D above for the Archivematica integration.